


[수정] 2020-05-01 : 종료 처리를 위한 내용 추가. UnicastProcessor이 아닌 Emitterprocessor로 구현 변경
이전 글(스프링 웹플럭스(WebFlux) SSE(Server Sent Event) 구현 1)에서 작성한 SSE 예제는 현실적이지 않다. 서로 다른 브라우저에서 /stocks/123 으로 연결하면 서로 다른 값이 표시된다. 실제라면 둘 다 같은 값을 출력해야 한다. 그래서 이 글에서는 조금 더 현실적인 예를 만들어보려 한다. 여기서 만들 예는 사용자 ID별로 데이터를 전송하는 기능이다.
여기서 구현할 클래스는 세 개다.
- UserChannel : 사용자 ID별로 메시지를 보내기 위한 채널이다. Flux를 이용해서 메시지를 전송한다.
- UserChannels : 사용자 ID에 대한 UserChannel을 관리한다.
- UserChannelApi : SSE를 사용자 ID 별로 메시지를 전송하는 기능을 제공한다.
UserChannel 클래스
UserChannel 클래스는 다음과 같다.
public static class UserChannel {
    private EmitterProcessor<String> processor;
    private Flux<String> flux;
    private FluxSink<String> sink;
    private Runnable closeCallback;

    public UserChannel() {
        processor = EmitterProcessor.create();
        this.sink = processor.sink();
        this.flux = processor
                .doOnCancel(() -> {
                    logger.info("doOnCancel, downstream " + processor.downstreamCount());
                    if (processor.downstreamCount() == 1) close();
                })
                .doOnTerminate(() -> {
                    logger.info("doOnTerminate, downstream " + processor.downstreamCount());
                });
    }

    public void send(String message) {
        sink.next(message);
    }

    public Flux<String> toFlux() {
        return flux;
    }

    private void close() {
        if (closeCallback != null) closeCallback.run();
        sink.complete();
    }

    public UserChannel onClose(Runnable closeCallback) {
        this.closeCallback = closeCallback;
        return this;
    }
}
하나의 데이터를 여러 클라이언트에 전송하기 위해 EmitterProcessor를 사용했다. 이 코드는 데이터를 전송하기 위해 EmitterProcessor#sink()로 구한 FluxSink를 사용한다.
클라이언트와 연결이 끊기면 cancel 이벤트가 발생하는데 이때 1개 남은 클라이언트가 연결을 종료하면 close() 메서드를 실행해서 스트림을 끝낸다. onClose()는 스트림을 끝내기 전에 호출할 콜백을 전달받는다.
send() 메서드는 FluxSink#next() 메서드를 이용해서 데이터를 Flux에 데이터를 보낸다.
UserChannels 클래스
UserChannels 클래스는 UserChannel을 맵으로 관리한다.
public static class UserChannels {
    private ConcurrentHashMap<Long, UserChannel> map = new ConcurrentHashMap<>();

    public UserChannel connect(Long userId) {
        return map.computeIfAbsent(userId, key -> new UserChannel().onClose(() ->
                map.remove(userId)));
    }

    public void post(Long userId, String message) {
        Optional.ofNullable(map.get(userId)).ifPresentOrElse(ch -> ch.send(message), () -> {
        });
    }
}
UserChannel의 스트림이 끝나면 map에 UserChannel 객체를 제거한다.
UserChannelApi 클래스
UserChannelApi가 제공하는 API는 두 개다.
- GET /channels/users/{userId}/messages : 특정 사용자의 메시지를 수신하기 위한 SSE 구현
- POST /channels/users/{userId}/messages : 특정 사용자에 메시지를 보내기 위한 API
다음은 두 API의 구현이다.
@RestController
public class UserChannelApi {
    private UserChannels channels = new UserChannels();
    private AtomicInteger id = new AtomicInteger();

    @GetMapping("/channels/users/{userId}/messages")
    public Flux<ServerSentEvent<String>> connect(@PathVariable("userId") Long userId) {
        int no = id.getAndAdd(1);
        Flux<String> userStream = channels.connect(userId).toFlux();
        Flux<String> tickStream = Flux.interval(Duration.ofSeconds(3))
                .map(tick -> "HEARTBEAT " + no);
        return Flux.merge(userStream, tickStream)
                .map(str -> ServerSentEvent.builder(str).build());
    }

    @PostMapping(path = "/channels/users/{userId}/messages",
                 consumes = MediaType.TEXT_PLAIN_VALUE)
    public void send(@PathVariable("userId") Long userId,
                     @RequestBody String message) {
        channels.send(userId, message);
    }
}
connect() 메서드는 클라이언트를 특정 사용자 채널에 연결하고 채널의 메시지를 ServerSentEvent로 변환해서 클라이언트에 전송한다. 클라이언트 연결을 감지하기 위해 3초 간격으로 이벤트를 발생하는 스트림과 사용자 스트림을 머지했다.
send() 메서드는 특정 사용자 채널에 메시지를 전송한다. @PostMapping 애노테이션의 consumes 값이 text/plain이므로 HTTP 요청 몸체로 받은 값을 문자열로 처리한다.
실행
구현을 했으니 동작을 확인할 차례다. 서버를 구동하고 크롬과 같이 SSE를 지원하는 브라우저를 두 개 띄운다. 그리고 Talend API Tester나 Postman 등 send() API를 호출하기 위한 도구를 준비한다. 참고로 서버 포트는 18080으로 변경했다.
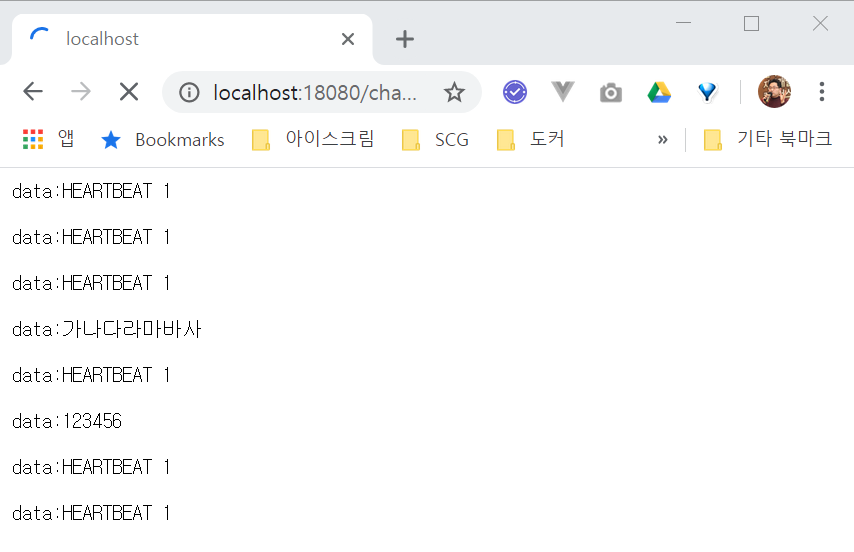
첫 번째 브라우저에서 http://localhost:18080/channels/users/1/messages 에 접속한다. 그리고 POST로 데이터를 두 개 전송한다. 그러면 첫 번째 브라우저에 POST로 전송한 두 문자열이 표시되는 것을 확인할 수 있다.
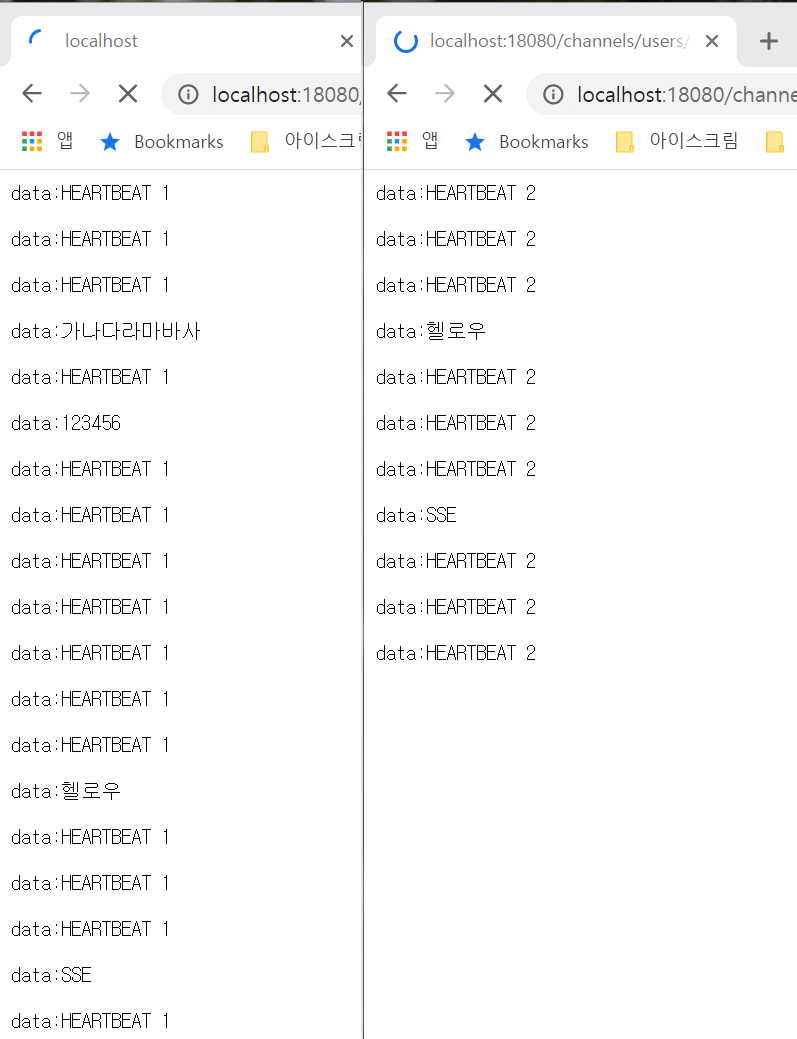
두 번째 브라우저에서 접속한 뒤에 다시 POST로 메시지를 몇 개 더 전송한다. 아래 그림과 같이 첫 번째 브라우저와 두 번째 브라우저가 동일 데이터를 수신한 것을 확인할 수 있다.